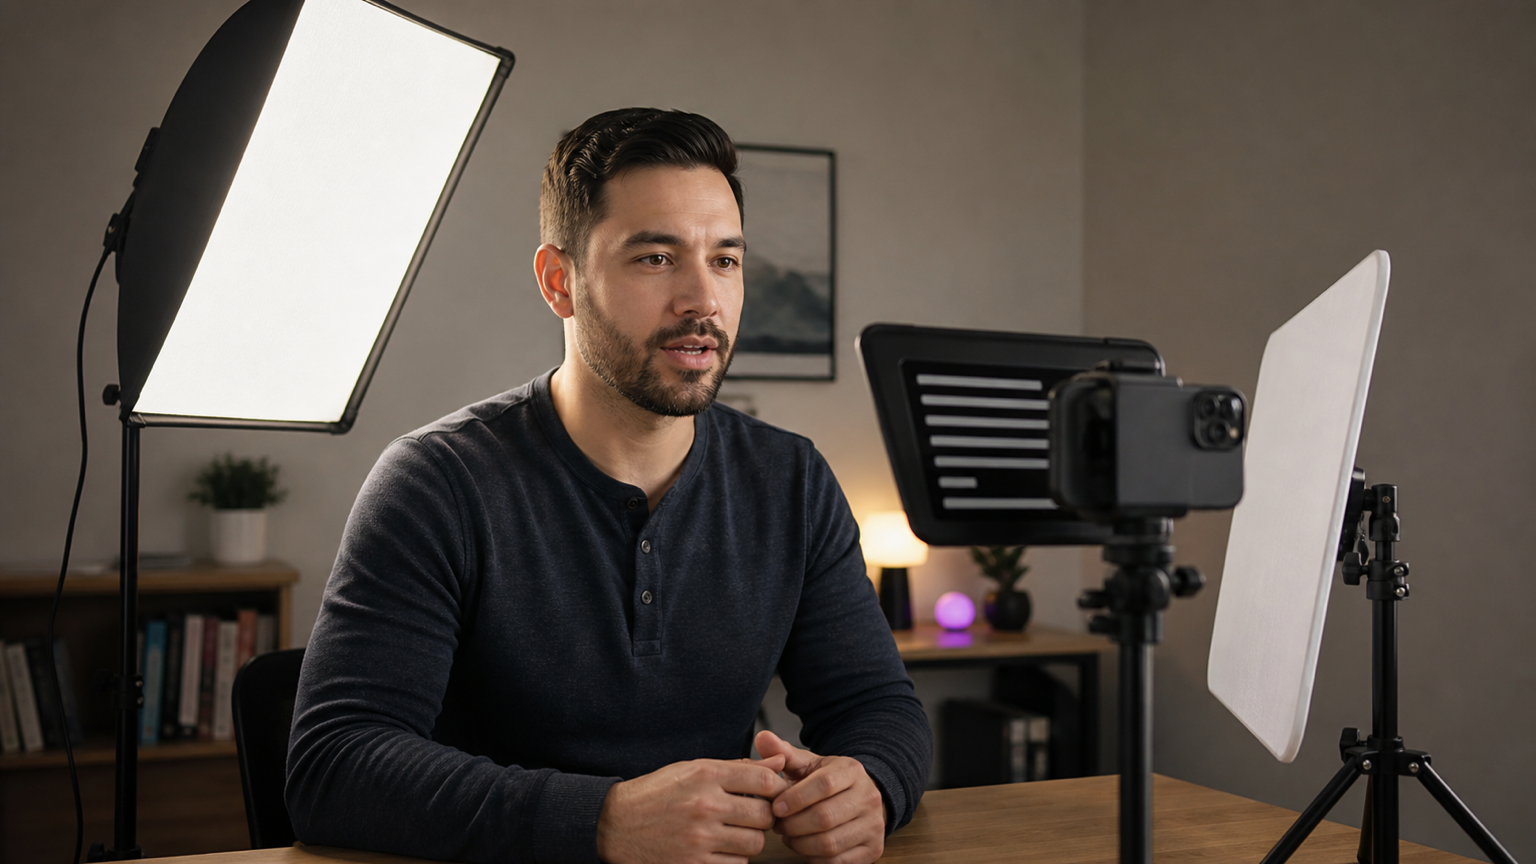
A good mobile teleprompter lighting setup starts with one stable eye line and one soft light that makes the face easy to read. Fix the phone at the final height and orientation first. Then place the key light, soften the shadow side, control the background, and record a short test with the exact camera and teleprompter settings you plan to use.
You do not need a studio full of fixtures. A window, one diffused light, or one light plus a reflector can be enough. The important work is making the result repeatable: the phone stays near eye level, the light does not create distracting reflections, skin color remains consistent, and the recorded file shows no visible flicker or moving bands.
Quick lighting setup for a mobile teleprompter video
- Choose portrait or landscape and mount the phone securely at the presenter's eye level.
- Set the final presenter position and leave some distance from the background.
- Turn off overhead or decorative lights that create mixed color or hard shadows.
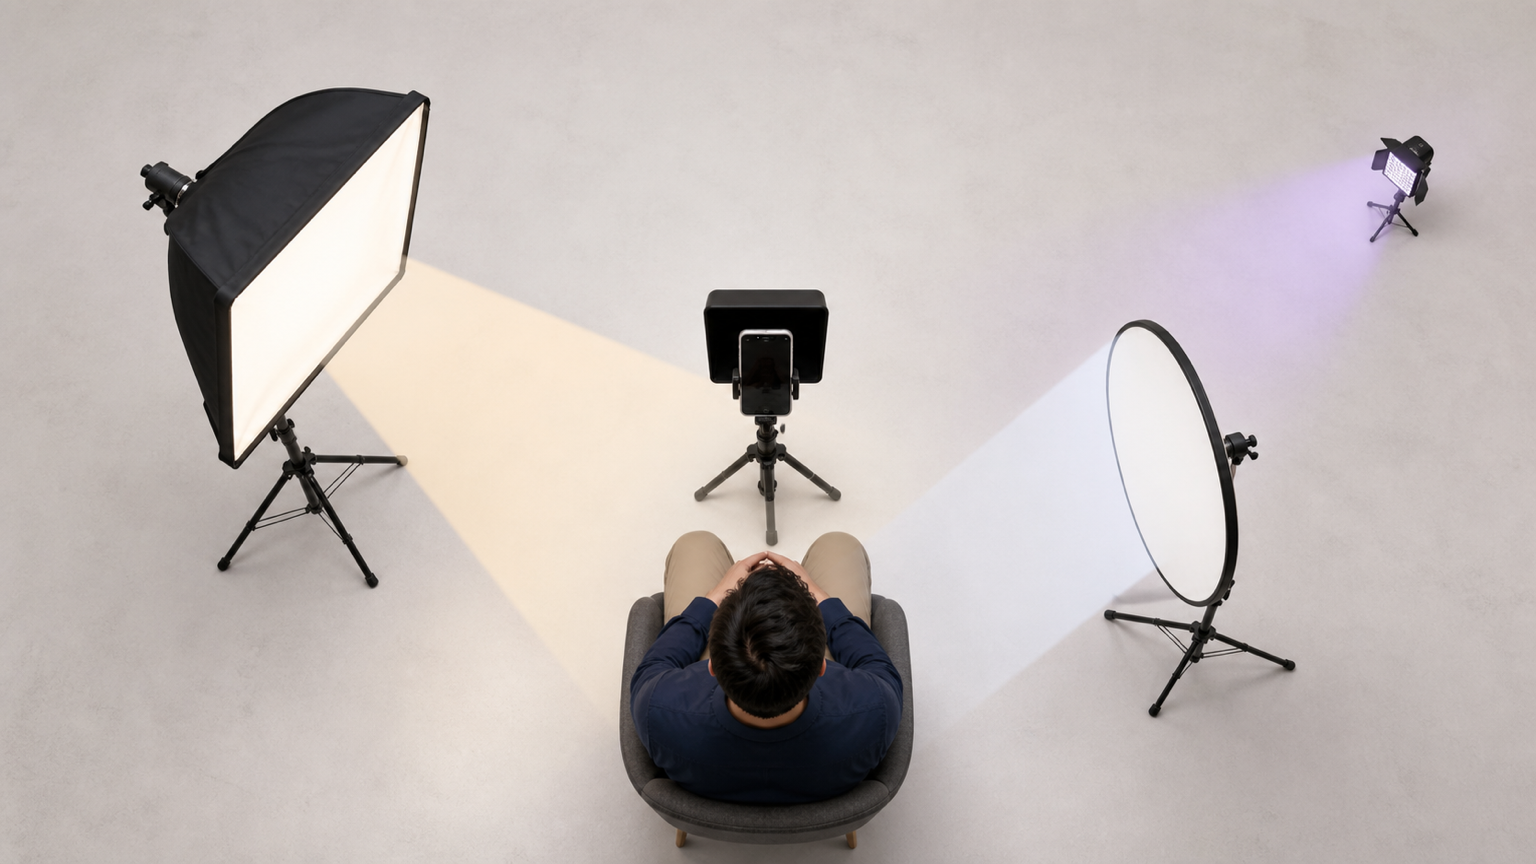
- Place a window or diffused key light about 30 to 45 degrees to one side of the phone and slightly above the eyes.
- Use a white reflector, pale wall, or weaker fill on the opposite side only if the shadow is too deep.
- Add a small background or edge light only when the presenter blends into the room.
- Check glasses, glossy skin, the phone screen, and any teleprompter glass for reflections.
- Prepare the script, reader pace, cue position, camera, grid, and countdown.
- Record 15 to 30 seconds with normal speech and movement.
- Review exposure, skin color, eye line, shadows, background, reflections, and flicker before the full take.
Build the baseline layout around the phone
The phone is the anchor for the whole setup. Decide which camera you will use, set the final orientation, place the lens at the presenter's natural eye level, and frame the finished shot before moving a light. If the stand, clamp, or eye line is not settled, use a stable phone teleprompter support workflow first.
Stand or sit where you can speak with relaxed posture. Put the key light on one side of the phone rather than directly above it. Place a reflector or weaker fill on the other side. If the wall or background needs separation, aim a small light at the background or add a restrained edge light behind the presenter. Keep every stand outside the walking path and the final frame.
Choose the simplest light that gives a stable result
Window light: Face a large window or turn slightly so the window becomes a soft side key. A sheer curtain can reduce hard direct sun. Window light is inexpensive and flattering, but it changes with clouds and time, so it works best for short sessions when the brightness stays predictable.
One diffused light: A softbox, diffused LED panel, or bounced light gives you control at any time of day. Put it just outside the frame and adjust distance or output until the face is bright without losing detail. Use a white wall or reflector only if the far side of the face becomes too dark.
Two or three lights: Add a weaker fill when you need more shadow control. Add a background or edge light when the presenter needs separation from a dark or similarly colored background. Each extra light should solve a visible problem; it should not be present only because a diagram calls it a three-point setup.
Ring light: A ring light can fit a small space and keep the phone close to its center. Start at modest output and test the circular reflection in glasses and eyes. Detailed ring-light positioning is its own workflow; for this broader setup, treat it as another possible key light rather than a guaranteed fix.
Place the key light for a readable face
A practical starting point is about 30 to 45 degrees to one side of the phone and slightly above eye level, angled down toward the presenter. This gives the face shape while keeping both eyes visible. A diffused source usually looks calmer than a small bare lamp because its transition from light to shadow is broader.
Move the light closer for a softer result, provided it stays outside the frame and does not make the presenter uncomfortable. Reduce output if the nearest forehead or cheek becomes too bright. Move it farther away when the light is uneven across a standing presenter's movement range, then raise output only as much as the recorded image needs.
Watch the eyes while moving the light. The presenter should be able to read without squinting, and the brightest reflection should not cover the pupil or pull attention away from the message.
Fill the shadow side without making the image flat
Fill is not a second key. Its job is to soften a shadow that has become distracting while preserving enough contrast to keep the face dimensional. Start with no fill, record a sample, and add it only if the unlit side loses useful facial detail.
A white foam board, foldable reflector, pale wall, or diffused lamp at lower output can all work. Bring the reflector closer for more lift or move it away for more contrast. If both sides of the face look equally bright and the image feels flat, reduce the fill before changing the key.
Separate the presenter from the background
First create separation with distance. Moving the presenter away from the wall gives shadows room to fall out of frame and makes the background easier to control independently. Choose clothing that does not disappear into the wall, and remove bright objects that compete with the face.
If distance is limited, aim a small light at a plain section of the background or place a restrained edge light behind and to one side of the presenter. Keep it weaker than the key and check that it does not flare into the phone lens. A practical lamp can stay visible when it belongs in the room, but it should not become the brightest object in the frame.
Control glasses, screen, and teleprompter reflections
Reflections are geometry problems. If a softbox appears in glasses, raise it, move it farther to the side, or turn the presenter's face a few degrees while keeping the eyes near the lens. Make one small change at a time and review the recorded clip, because a reflection that looks minor in the preview may become obvious on a larger screen.
Lower the phone display only enough to stop a visible color cast or screen reflection while keeping the script comfortably readable. Clean the camera lens, glasses, and any beam-splitter glass before the test. If you use a glass teleprompter accessory, follow its mounting and mirror instructions and block stray light from entering the hood; do not assume the app-only and glass-assisted setups need the same reader mirror setting.
Keep the color of every light consistent
Choose one dominant light family for the face. If daylight is the key, match adjustable fixtures to it or switch off warm ceiling lamps that create different colors across the skin. If artificial light is the key, control the window with a blind or curtain when changing daylight makes the shot drift during a long take.
Judge color from a recorded test, not only from the live preview. Use the same light settings for every take in a sequence. If the recording path exposes a white-balance lock, set it only after the final lights and presenter position are in place; otherwise keep the scene stable so automatic color has less reason to change.
Test LEDs for flicker and moving bands
Some artificial lights can look steady to your eyes but produce pulsing brightness, horizontal bands, or changing color on camera. Test the exact fixture, dimmer level, camera, resolution, and frame rate you will use. Include a few seconds of stillness and a hand movement, then watch the saved file at normal speed and pause on several frames.
If you see flicker, first try a different light output, remove a questionable dimmer, turn off the problem fixture, or use another continuous light. If your recording device or app exposes anti-flicker or manual shutter controls, follow that product's documentation rather than guessing a value. Record again after every change; the saved file is the decision point.
Prepare Teleprompter Automatic for the lighting test
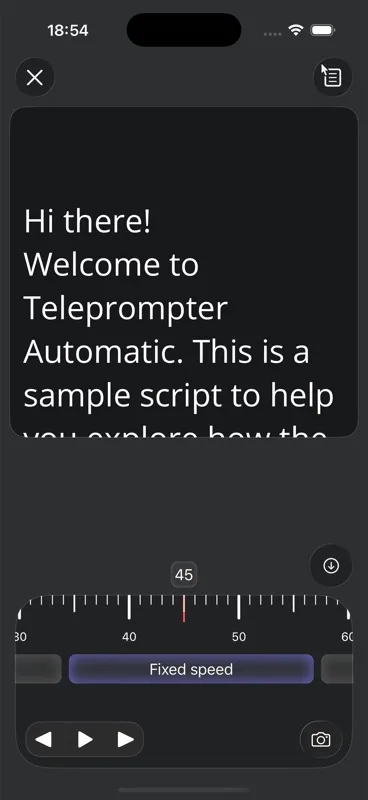
Open the final script and choose a readable text size, comfortable line spacing, and a cue position that keeps the eyes close to the lens. Test the scrolling and reader controls aloud at the real speaking pace. A bright screen should not replace the key light, and a dim screen should not make the presenter lean forward to read.
Choose the intended front or back camera, orientation, compatible recording format, grid, mirror behavior, and countdown before judging the lights. The camera and recording settings guide covers those controls and the short playback check. Settings vary by platform, camera, and device, so keep the same tested combination for the full take.
Review one short clip in a fixed order
- Face brightness: Check that the forehead and nearest cheek keep detail while the shadow side remains readable.
- Skin color: Look for a stable, believable tone without warm and cool patches from mixed lights.
- Eyes and prompt: Confirm the text is readable, the gaze stays near the lens, and the screen does not cast a distracting color.
- Reflections: Inspect glasses, eyes, glossy surfaces, and teleprompter glass for the key light or room lamps.
- Background: Make sure the presenter is separated without a bright lamp, hotspot, or hard wall shadow taking over the frame.
- Flicker and exposure: Watch for moving bands, pulsing brightness, or automatic exposure changes during gestures.
- Full workflow: Read the opening, pause, move naturally, and finish the closing line so the test represents the real take.
Change one variable after each review. Moving the key, changing output, rotating the presenter, and altering camera settings at the same time makes it hard to know what solved the problem.
Save a repeatable lighting map
When the test works, mark the phone, chair, presenter, key-light, and reflector positions with removable floor tape or measured notes. Save the light output and color settings, phone orientation, selected camera, recording format, reader pace, and time of day when a window is involved.
Take one private reference photo of the room without scripts, accounts, or personal information visible. A simple setup record turns the next recording into a short reset instead of a new lighting experiment. Continue with the record and export workflow once the lighting, reader, camera, and audio test all pass.
Common mobile teleprompter lighting mistakes
- placing lights before fixing the phone height, camera, orientation, and frame
- using a small bare lamp close to the face and creating hard shadows
- leaving a ceiling light on when it creates a second color or shadow direction
- matching key and fill so closely that the face loses shape
- putting the presenter against the wall and trying to fix separation only with more light
- raising phone brightness until the screen adds a visible color cast
- ignoring glasses, glossy furniture, or teleprompter-glass reflections
- dimming an LED without recording a flicker test at the final camera settings
- judging only the live preview instead of the saved clip
- changing several lights and camera controls between tests
Related Teleprompter Automatic guides
- teleprompter workflow for content creators - Connect lighting to script preparation, delivery, recording, and publishing.
- stable phone teleprompter support - Secure the phone, choose eye level, and control a mounted device safely.
- scrolling and reader controls - Tune text size, cue position, mirror behavior, and reading pace.
- camera and recording settings - Prepare the camera, format, grid, countdown, mirror, and short test.
- record and export workflow - Review the approved take and save the finished recording.
- complete home video setup - Add script, audio, framing, and broader home-recording guidance.