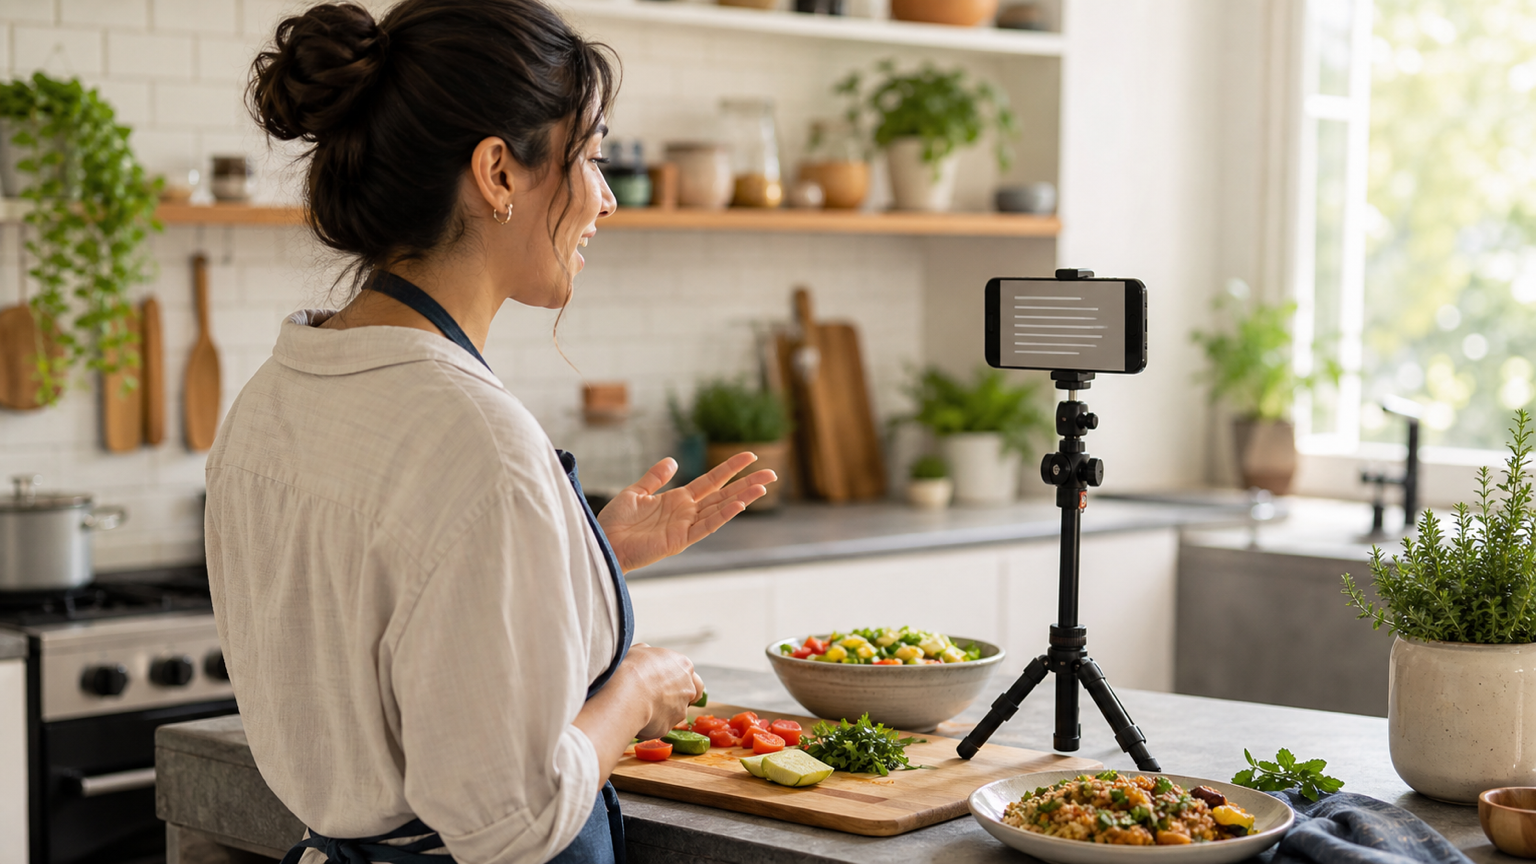
A useful recipe video lets the viewer understand the dish, follow the important steps, and see what each stage should look like. A teleprompter app can keep that explanation concise while the cook concentrates on ingredients, timing, camera framing, and safe movement in the kitchen.
The best workflow is not to scroll the written recipe from top to bottom during one continuous take. Separate what the cook says from what the cook does, build the script around visible changes in the food, and record short blocks that can be checked and repeated. This guide shows how to plan that workflow with a phone teleprompter.
Quick workflow for recording a recipe video
- Choose one dish, one viewer skill level, and one result the video should teach.
- Verify the ingredient amounts, equipment, order, and food-safety guidance before scripting.
- Divide the plan into spoken lines, kitchen actions, and visual proof shots.
- Write short teleprompter blocks around natural pauses in the recipe.
- Choose the final frame and place the mounted phone where its screen faces the cook without entering the work zone.
- Rehearse the script with the real ingredients and tune the reader at camera distance.
- Record a complete setup test, then film the recipe in focused sections.
- Capture close details and pickups only where they help the viewer follow the method.
- Review the finished video for recipe accuracy, continuity, sound, and a clear final result.
The teleprompter carries the explanation and sequence. It should not make the cook read while handling a knife, lifting a hot pan, pouring near the phone, or performing another step that requires full visual attention.
Choose one dish and one viewer result
Start by defining what the viewer should be able to do after watching. “Make a weeknight tomato pasta with a smooth sauce” is clearer than “learn Italian cooking.” The first goal gives the video a visible result, a manageable ingredient list, and a reason for every spoken line.
Name the intended experience level as well. A beginner may need to see how finely an ingredient is chopped and how the sauce changes texture. An experienced cook may need only the order, timing cues, and the detail that makes this version different. Do not overload one video with a beginner lesson, a product review, a personal story, and several recipe variations.
Keep the recipe source beside the production plan. Confirm every amount, substitution, preparation note, and cooking instruction before the camera session. If the recipe includes allergens, raw ingredients, storage advice, or safety-sensitive temperatures, use current authoritative guidance for the audience and location instead of improvising a rule on camera.
Build the script in three tracks
A recipe video becomes easier to record when the plan has three separate tracks:
- Spoken line: the words the cook reads or uses as a prompt.
- Kitchen action: the physical step that happens before, during, or after the line.
- Visual proof: the angle or close detail that shows the viewer what “ready” looks like.
For example, the spoken line might explain that the onions should soften without browning. The kitchen action is stirring and adjusting the heat. The visual proof is a close shot of the translucent texture. These elements belong together in the plan, but only the spoken line belongs in the clean teleprompter script.
Label silent production cues consistently, such as ACTION, CLOSE SHOT, PAUSE, and VERIFY. Treat them as writing conventions rather than automatic app commands. Remove any note that the presenter might accidentally read aloud, or place it on its own line with enough space to recognize it.
Write around actions, not paragraphs
Written recipes compress many actions into one paragraph. Spoken recipe scripts should not. Put one useful idea in each short block and place the block before or after the physical action that it explains.
A practical sequence is: name the ingredient, explain why the step matters, pause scrolling, perform the action, then describe the visible result. If the cook must look down for accuracy or safety, finish the spoken line first. Resume only when attention can return to the lens.
Use concrete sensory cues when they are reliable: color, texture, thickness, sound, or aroma. “Cook until ready” tells the viewer almost nothing. “Stir until the sauce coats the spoon in a thin, even layer” gives the viewer something visible to compare. Keep personal stories and origin notes brief unless they directly help someone understand the recipe.
Plan the camera frame before the teleprompter pace
Decide whether the video is a face-to-camera explanation, an overhead demonstration, a side-angle kitchen tutorial, or a mix of those views. The teleprompter is most useful for the direct-to-camera parts. Overhead hand shots and close food details usually need action cues or a short voiceover rather than continuous eye contact.
Choose the publishing frame before recording, but avoid relying on a current platform limit or interface that may change. Keep the cook, the active work surface, and the important food detail inside the intended crop. If you need horizontal and vertical versions, test both safe areas or record separate framing rather than assuming one crop will preserve every step.
Make a small shot list: finished dish, presenter opening, ingredient overview, key technique, visible transformation, texture check, and final serving. A shot earns its place when it proves something the narration says.
Mount the phone outside the kitchen work zone
Place the phone on a stable tripod or mount with the screen and front camera facing the cook. Keep it close enough to the speaking eye line but outside the path of knives, hot pans, steam, splashes, cords, and moving elbows. Do not balance the device against containers or cookware.
Mark the tripod position and the cook's standing position before ingredients cover the counter. Check that the mount cannot tip when a drawer opens or someone passes behind it. Keep charging cables away from sinks, heat, and walking paths, and do not handle the phone with wet, greasy, or food-covered hands.
When the mounted phone should remain untouched, Web Remote control can manage a paired reader from another browser device. Put the control device in a clean, dry place and test the connection before cooking begins.
Set the reader for kitchen delivery
Create or import the clean spoken version with the script creation and import workflow. Keep ingredient research, private notes, and the production shot list outside the reader copy. Short paragraphs, readable text, and generous spacing make it easier to find the next line after looking down at the food.
Fixed-speed scrolling can work for the opening, ingredient overview, and closing. Timed or words-per-minute modes are useful only when the script and pauses have been rehearsed. Speech-driven scrolling may leave more room for natural delivery, but kitchen noise, an extractor fan, running water, and unfamiliar ingredient names can affect recognition, so test it in the real room before relying on it.
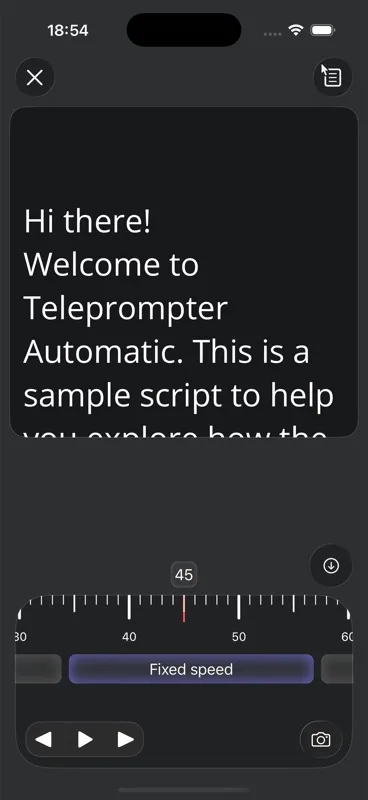
The scrolling and reader controls guide explains the available pacing and display settings. Tune them while speaking and moving through a sample step, not while reading silently at a desk.
Rehearse with a dry run before using ingredients
Walk through the recipe with empty bowls, cold cookware, and placeholder ingredients first. Check where each spoken block starts, which action interrupts eye contact, and whether the cook can reach every tool without crossing the tripod.
Read the ingredient names and measurements aloud. Rewrite any line that is hard to say while moving. Confirm that the order in the script matches the order on the counter. If an ingredient must stay chilled or a step is time-sensitive, plan the camera around the recipe rather than leaving the food waiting for a long explanation.
Use the speech time calculator to estimate narration, then add the real preparation, resting, and visual-check time separately. A three-minute script does not mean the full recipe can be filmed as one three-minute take.
Record a complete setup test
Record 20 to 30 seconds with the real camera, microphone, light, background, phone position, and kitchen sound. Include one spoken line, one look down at the work surface, and one return to the lens. Review the test for eye line, focus, exposure, intelligible sound, and whether the next teleprompter line is easy to recover.
- Check that steam or bright windows do not wash out the cook or the food.
- Listen for extractor fans, refrigerators, timers, water, and cookware that compete with the voice.
- Make sure labels, addresses, private notes, and unrelated screens are not visible.
- Confirm that the tripod remains stable when the cook reaches across the counter.
- Verify that the active preparation area is visible without bringing the phone into it.
- Watch for flicker, reflections, and autofocus shifts around shiny cookware.
The camera and recording settings guide covers camera, microphone, countdown, grid, mirror, and framing checks before a full take.
Film the recipe in focused blocks
Divide the session at natural edit points: opening and finished-dish promise, ingredient overview, preparation, one or more cooking transformations, texture or doneness check, serving, and closing. Leave a short pause before and after each block so the edit has a clean boundary.
Record the direct-to-camera explanation first when the counter is tidy. Then capture the hands-on action without forcing the cook to look at the teleprompter. Return to the reader for transitions, reasons, and the final summary. This separation protects both clarity and safe attention.
If one measurement or ingredient name is wrong, repeat the complete sentence and the related visual step when possible. Editing around half of a correction can create a recipe that sounds right but shows the wrong bowl, quantity, or stage.
Capture close details that prove the method
Recipe viewers often need the transformation more than another view of the presenter. Capture the crumb, thickness, browning, bubble size, knife cut, or finished texture that tells them the step worked. Hold the shot long enough to inspect it.
Keep continuity notes for ingredient levels, utensil position, garnish, cookware, and the state of the food. A pickup recorded later should not show an empty bowl before the ingredient was supposedly added. If the real process changes from the script, update the narration instead of arranging a misleading shot.
Use close details selectively. Repeating the same stirring angle does not teach more. Each insert should answer a viewer question: what goes in, how it changes, or how to recognize the result.
Protect recipe accuracy during recording
Keep a verified recipe card off camera and assign one person to check it when a producer is available. Before each block, confirm the ingredient, amount, order, and spoken cue. For a solo recording, prepare labeled containers and use a simple completed/not-completed checklist outside the frame.
Do not estimate a quantity on camera because the original note is out of reach. Pause and verify it. Do not present an optional substitution as equivalent unless the recipe has been tested that way. Separate personal preference from an instruction the viewer needs to reproduce the dish.
Food safety deserves the same discipline. Avoid vague assurances, verify safety-sensitive guidance from an authoritative current source, and never let the production setup encourage unsafe handling of heat, blades, raw ingredients, or electrical equipment.
Review the video as a cook would use it
Watch the first review for the recipe alone. Could a viewer identify the ingredients, order, key technique, and final state without guessing? Then review the production: is the voice clear, is the important action visible, and do pickups preserve continuity?
Verify every measurement, ingredient name, temperature statement, timing instruction, substitution, and storage note against the approved recipe source. Check that captions and on-screen text match the spoken version. If a visual shows a different amount or stage, correct the edit or record the block again.
Finally, check the beginning and end. The opening should state the dish and useful result quickly. The closing should show the finished food and give one honest next action, such as trying the recipe, saving the ingredient list, or practicing the technique.
Export the approved recipe video
When the recipe and edit are accurate, use the record and export workflow to save the approved take. Prepare the crop, captions, and duration for the real destination, and keep the verified script with the final file.
If you create several versions, name them by dish, frame, language, and approval state rather than “final” and “final two.” Keep the master recipe, teleprompter copy, shot list, and approved export together so a future update does not revive an incorrect draft.
Recipe video script template
- Finished result: name the dish and the specific outcome the viewer will learn.
- Ingredient overview: mention only the ingredients or preparation details needed before the first step.
- Step setup: say what happens next and why it matters.
- Action pause: stop reading and perform the technique with full attention.
- Visual check: describe the color, texture, sound, or other reliable sign that the step is complete.
- Transition: explain how this state leads to the next step.
- Finished dish: show the final texture or serving result.
- Next action: invite the viewer to try, save, or adapt the recipe without making an unsupported promise.
For a simple sauce, the opening might promise a smooth weeknight result. The ingredient overview names the prepared components. Each action block explains one transformation, pauses for hands-on work, and returns with a visible texture check. The closing shows how the sauce coats the finished dish. The teleprompter keeps those teaching points in order while the food remains the proof.
Common recipe video mistakes
- scrolling the written recipe as one long paragraph
- trying to read while cutting, pouring, lifting hot cookware, or watching a time-sensitive step
- placing the phone inside the active preparation, heat, steam, or splash zone
- filming before verifying measurements and ingredient order
- letting a fixed scroll pace rush a physical technique
- showing decorative kitchen shots instead of the texture or transformation the viewer needs
- recording pickups that break ingredient or cookware continuity
- leaving extractor-fan and cookware noise unchecked
- presenting untested substitutions or vague safety advice as fact
- exporting before comparing the spoken recipe, captions, and visible actions
Related Teleprompter Automatic guides
- teleprompter for content creators - Connect recipe videos to the broader scripted recording workflow.
- create and import scripts - Move the verified spoken recipe into the app.
- scrolling and reader controls - Tune readable text, cue position, and pacing for the kitchen.
- speech time calculator - Estimate narration separately from preparation and cooking time.
- camera and recording settings - Check framing, sound, countdown, and capture options.
- Web Remote control - Keep a mounted phone untouched during the session.
- record and export videos - Review and save the approved recipe take.
- write a video script for a teleprompter - Refine spoken lines before adding kitchen actions and visual cues.